Redis
Coroot leverages eBPF to monitor Redis queries between applications and databases, requiring no additional integration. While this approach provides a high-level view of database performance, it lacks the visibility needed to understand why issues occur within the database internals.
To bridge this gap, Coroot also collects telemetry using the Redis INFO command, complementing the eBPF-based metrics and traces.
Kubernetes (pod annotations)
The Kubernetes approach to monitoring databases typically involves running metric exporters as sidecar containers within database instance Pods. However, this method can be challenging for certain use cases. Coroot has a dedicated coroot-cluster-agent that can discover and gather metrics from databases without requiring a separate container for each database instance.
Coroot-cluster-agent automatically discovers and collects metrics from pods annotated with coroot.com/redis-scrape annotations.
Coroot can retrieve database credentials from a Secret or be configured with plain-text credentials.
coroot.com/redis-scrape: "true"
coroot.com/redis-scrape-port: "6379"

# plain-text credentials
coroot.com/redis-scrape-credentials-password: "<PASSWORD>"

# credentials from a secret
coroot.com/redis-scrape-credentials-secret-name: "redis-secret"
coroot.com/redis-scrape-credentials-secret-password-key: "password"
Note that Coroot checks only Pod annotations, not higher-level Kubernetes objects like Deployments or StatefulSets.
Non-Kubernetes environments
In non-Kubernetes environments, the Redis integration can be enabled via the Coroot UI. In this setup, coroot-cluster-agent retrieves Redis instance credentials from the Coroot configuration storage.
To configure the integration, go to the REDIS tab and click the Configure button.

Then, switch to Manual Configuration, complete the form, and click Save.
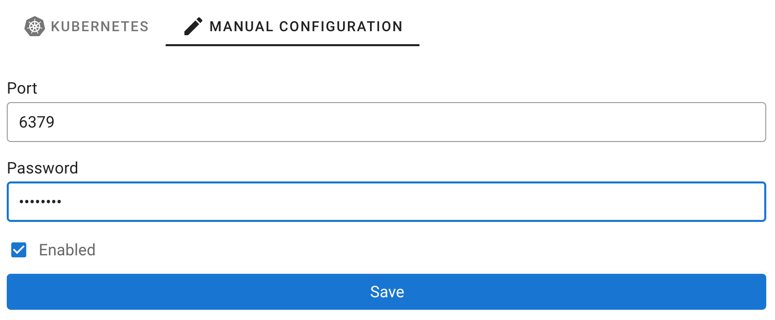
Coroot-cluster-agent updates its configuration every minute and also takes some time to collect metrics. Please wait a few minutes for telemetry to appear.
TLS
Set the tls parameter to true for a Redis or Valkey server that requires in-transit encryption, or to
skip-verify when the server certificate cannot be verified, for example when it is issued for a hostname and the
agent connects to the IP address. Managed caches that require TLS, such as OCI Cache, get skip-verify by default.
Configuration as code
When Coroot is deployed by the Kubernetes Operator, remote Redis instances can be
declared in the clusterAgent.databases section of the Coroot custom resource instead of the UI, with credentials
referenced from a Kubernetes Secret. A hostname is re-resolved on every configuration update, and every resolved IP
address is monitored, so DNS-based failover and multi-address names work without changes:
spec:
  clusterAgent:
    databases:
      - type: redis
        host: cache.example.internal     # or `elasticache: <CacheClusterId>` (AWS integration) / `memorystore: <instance name>` (GCP integration) / `ocicache: <display name>` (OCI integration)
        port: "6379"
        credentials:                     # only when AUTH is enabled
          passwordSecret: {name: redis-coroot, key: password}
Coroot attributes the collected metrics to the application it sees clients connecting to, by address. Settings in the
custom resource take precedence over the UI. Installations without the operator can put the same databases list in
the cluster-agent's configuration file.
Monitoring from the node
A Redis server installed as a system service on a VM, especially one listening on 127.0.0.1 only, can be monitored by
coroot-node-agent running on that VM instead of the cluster agent.
List it in the node agent's configuration file, /etc/coroot-node-agent/config.yaml by default:
databases:
  - type: redis
    host: 127.0.0.1
    port: "6379"
    credentials:                     # only when AUTH is enabled
      password: ${REDIS_PASSWORD}
The node agent finds the process listening on that address and attributes the collected metrics to its application, so they appear next to the server's CPU, memory, network and log telemetry.
Troubleshooting
Check the coroot-cluster-agent logs if you encounter any issues.