ClickHouse
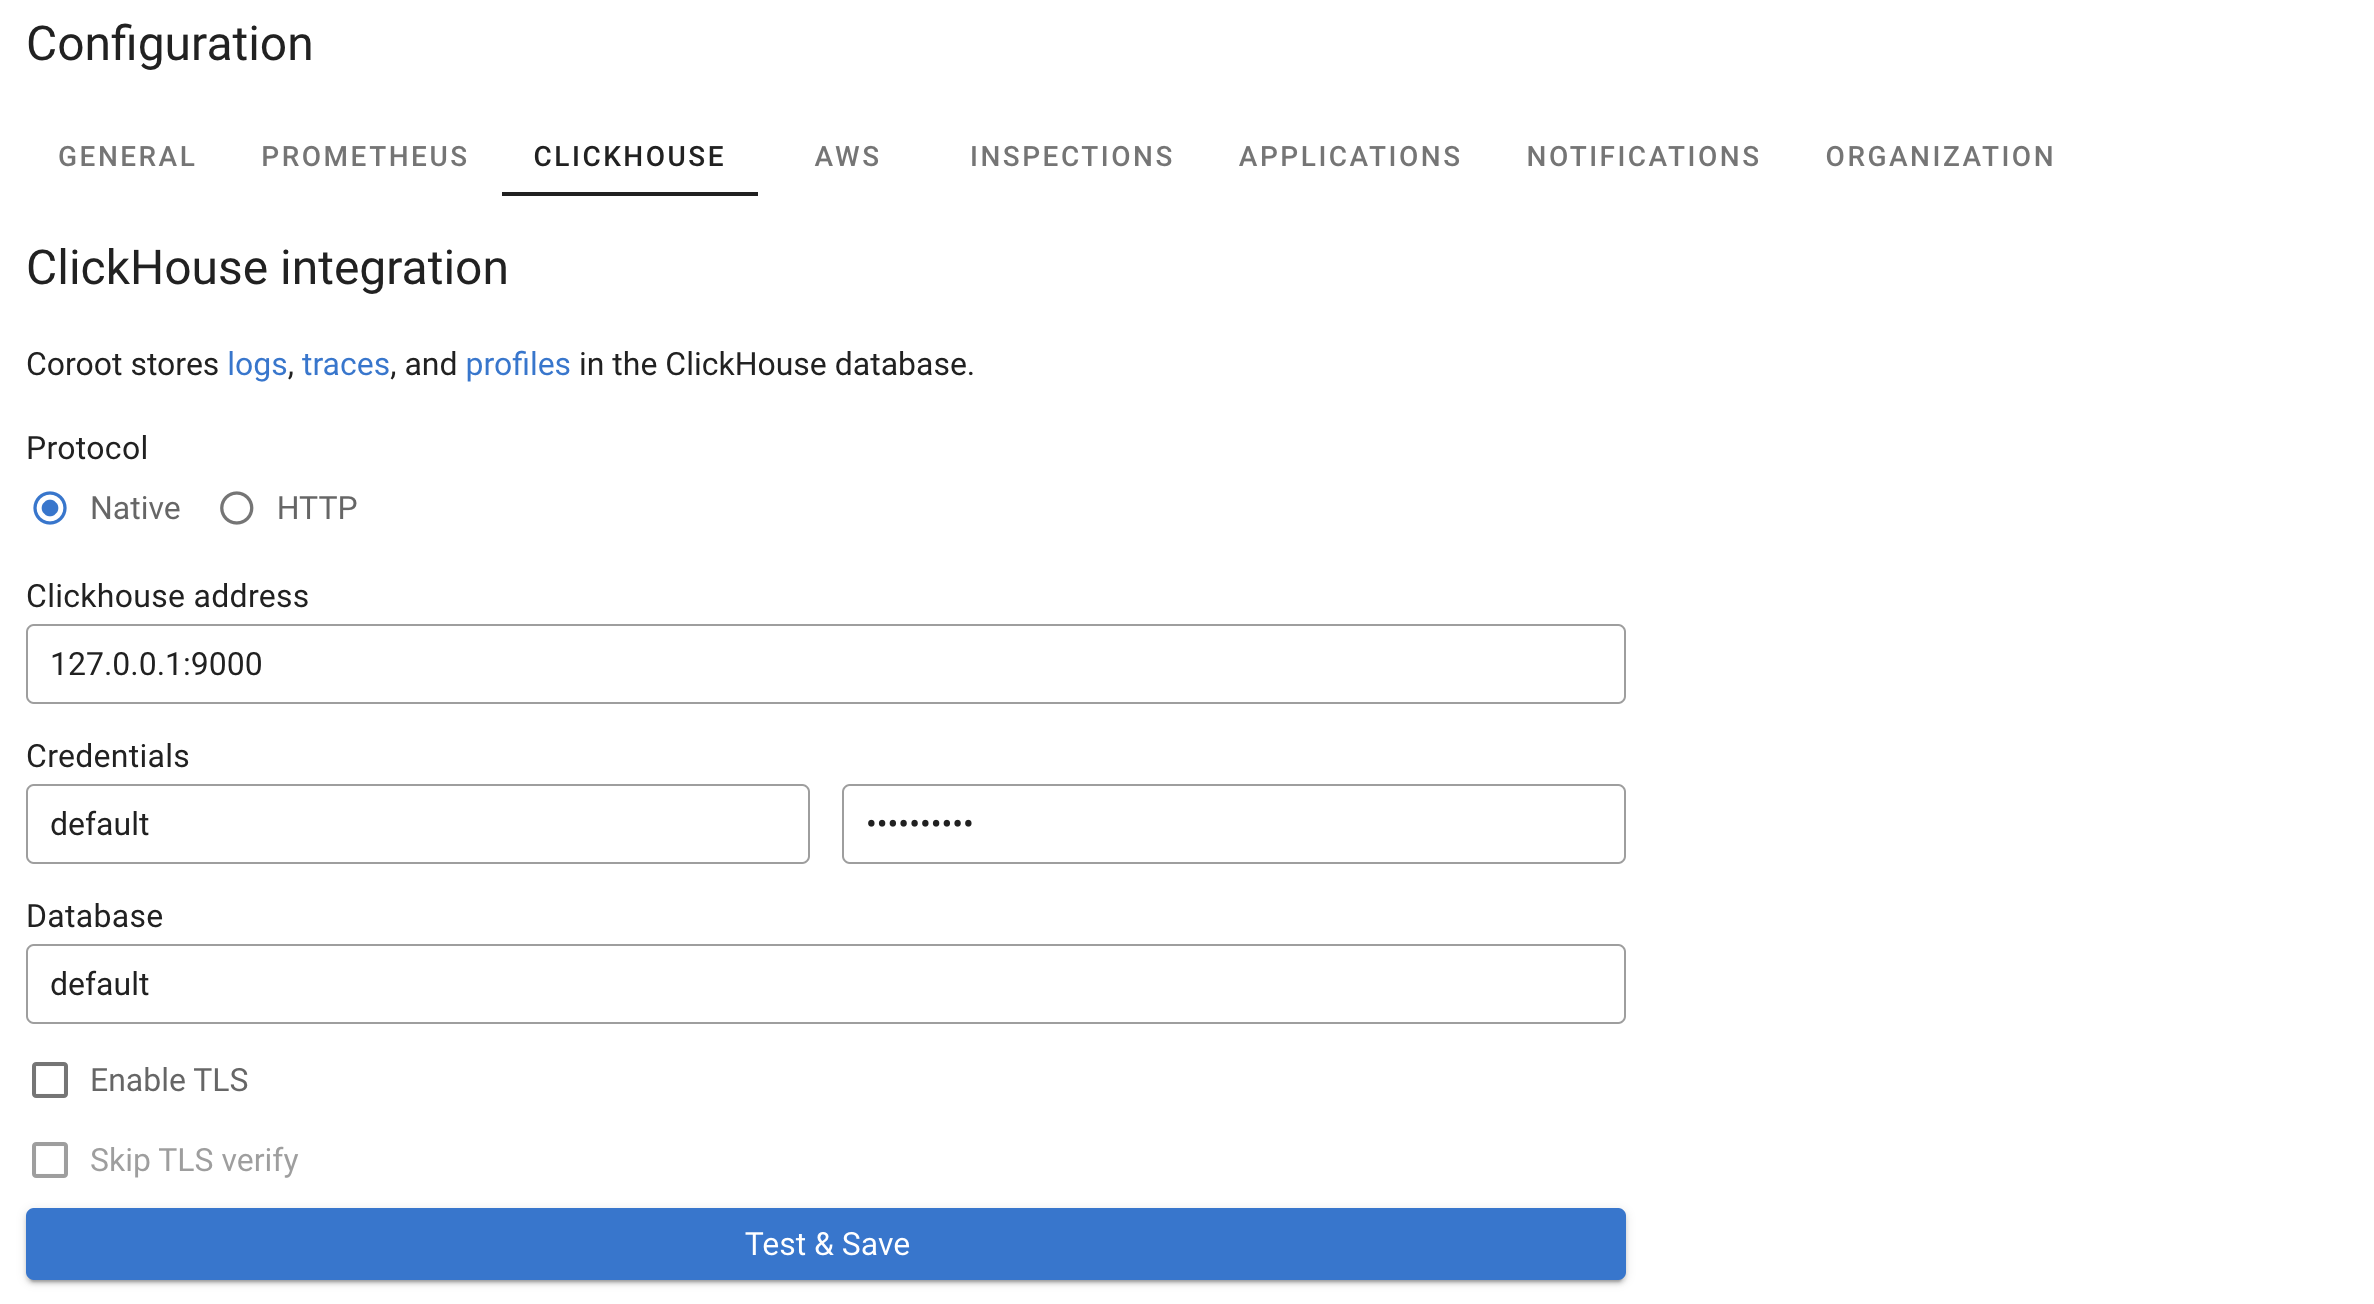
Coroot uses ClickHouse to store Logs, Traces, Profiles, and optionally Metrics. To integrate Coroot with ClickHouse, go to the Project Settings, click on Clickhouse, and configure the ClickHouse address and credentials as shown in the following example:

Coroot handles its own schema in ClickHouse, so you don't need to do anything manually.
Metrics Storage
In addition to logs, traces, and profiles, ClickHouse can be configured as an alternative storage backend for metrics instead of Prometheus. When both ClickHouse and Prometheus are configured, Coroot will prioritize ClickHouse for metrics storage.
Benefits of using ClickHouse for metrics:
- Unified storage: Store all telemetry data (logs, traces, profiles, and metrics) in a single database system
- Better compression: ClickHouse's columnar storage provides excellent compression for time-series data
- Scalability: Leverages ClickHouse's distributed architecture for handling large metric volumes
- Cost efficiency: Reduced infrastructure complexity by consolidating storage systems
When metrics storage is enabled in ClickHouse, Coroot creates dedicated tables for metrics and metadata, optimized for time-series workloads with appropriate indexing and TTL policies.
Statistics
Once ClickHouse is integrated, Coroot visualizes the cluster topology and breaks down storage usage by telemetry type. You can see how much space is used by logs, traces, profiles, and metrics (when enabled), along with compression ratios and retention settings. In clustered setups, Coroot also shows per-node disk usage and available space, making it easy to track storage health across the entire cluster.
Clustered ClickHouse
If Coroot is set up to work with a distributed ClickHouse cluster (sharded and/or replicated),
it automatically detects it using the SHOW CLUSTERS command.
Here’s how Coroot chooses a cluster:
- If no clusters are set up, it creates the table on the connected ClickHouse instance (single-node mode)
- If there’s only one cluster, it uses that
- If there are multiple clusters, it chooses the coroot cluster, or default if coroot isn’t available
Multi-tenancy mode
Coroot supports a multi-tenancy mode, enabling a single ClickHouse instance to store logs, traces, profiles, and metrics for multiple projects (or clusters).
In this mode, Coroot automatically creates a dedicated database for each project. Telemetry data pushed by Coroot agents (coroot-node-agent and coroot-cluster-agent) are stored in their respective project databases, ensuring isolation and efficient querying for individual projects.
Space Manager
The space manager automatically frees up disk space when your ClickHouse storage gets too full. It deletes old data to prevent your disks from running out of space.
The space manager checks your disk usage regularly. When disk usage gets too high, it deletes the oldest data partitions.
Example scenario:
- Your disk usage threshold is set to 70%
- Current disk usage reaches 76%
- The space manager kicks in and deletes the oldest partition from each telemetry table
- Since partitions are typically 1 day each, this frees up about 1 day worth of data
Important: Even if your TTL is set to 7 days, the space manager might keep only 6 days of data if disk space is tight. The space manager always prioritizes keeping your system running over keeping data for the full TTL period.
The cleanup only affects telemetry data (logs, traces, profiles, and metrics) and always keeps at least the minimum number of partitions you configure.
You can configure the space manager in three ways:
Configuration File (config.yaml):
clickhouse_space_manager:
  enabled: true                    # Turn space manager on/off
  usage_threshold_percent: 70      # Delete data when disk usage hits this %
  min_partitions: 1               # Always keep at least this many partitions
Environment Variables:
CLICKHOUSE_SPACE_MANAGER_DISABLED=true          # Turn off space manager
CLICKHOUSE_SPACE_MANAGER_USAGE_THRESHOLD=80     # Set cleanup threshold to 80%
CLICKHOUSE_SPACE_MANAGER_MIN_PARTITIONS=2       # Always keep at least 2 partitions
Command Line Flags:
--disable-clickhouse-space-manager                    # Turn off space manager
--clickhouse-space-manager-usage-threshold=80         # Set cleanup threshold to 80%
--clickhouse-space-manager-min-partitions=2           # Always keep at least 2 partitions
Default Settings:
- Enabled: Yes
- Cleanup threshold: 70% disk usage
- Minimum partitions: 1 per table
Example: With default settings and daily partitions, if your disk reaches 70% usage, the space manager will delete the oldest day of data from each table, but will never delete the last remaining partition.
ClickHouse Cloud
To use Coroot with ClickHouse Cloud, configure the external ClickHouse connection in your Coroot Custom Resource (CR) specification:
externalClickhouse:
  address: xxxxxxxxxx.eu-central-1.aws.clickhouse.cloud:9440
  user: default
  database: default
  passwordSecret:
    name: your-clickhouse-password # Name of the secret to select from.
    key: password # Key of the secret to select from.
  tlsEnabled: true
Key considerations for ClickHouse Cloud:
- TLS is required: Set
tlsEnabled: trueas ClickHouse Cloud enforces encrypted connections - Port 9440: Use the secure native port (9440) instead of the standard port (9000)
- Password secret: Store your ClickHouse Cloud password in a Kubernetes secret and reference it in
passwordSecret
To create the password secret using kubectl:
kubectl create secret generic clickhouse-cloud \
  --from-literal=password=your-clickhouse-password \
  -n coroot
- Database: Use
defaultfor initial connection - Coroot will automatically create dedicated databases likecoroot_xxxxxfor each project
The Space Manager is automatically disabled for ClickHouse Cloud connections.
TTL (Time To Live)
ClickHouse allows you to set a retention policy for tables when they are created. The TTL is now displayed in human-readable format on the configuration page (e.g., "7 days" instead of seconds). You can manually adjust the TTL by running the ALTER TABLE ... MODIFY TTL query.