OpenShift
Coroot Enterprise Edition is available in the OperatorHub catalog and is fully certified for OpenShift, making the installation process seamless and straightforward. Follow the steps below to install and configure Coroot Enterprise Edition on your OpenShift cluster.
Prerequisites
Before you begin, ensure the following:
- OpenShift Cluster:
- You must have an OpenShift 4.x cluster running.
- You must have cluster administrator privileges.
- Subscription:
- You need an active Coroot Enterprise Edition license. If you don't have one, you can get a license and start a free trial at Coroot Customer Portal.
- Internet Access:
- Ensure your cluster can access the Red Hat Ecosystem Catalog and the Coroot OperatorHub repository.
- Ensure your cluster can access
coroot.comfor license verification.
Step#1: Install Coroot Operator
Launch OpenShift web console. Using the Administrator view, navigate to Operators > OperatorHub.
Search for Coroot.
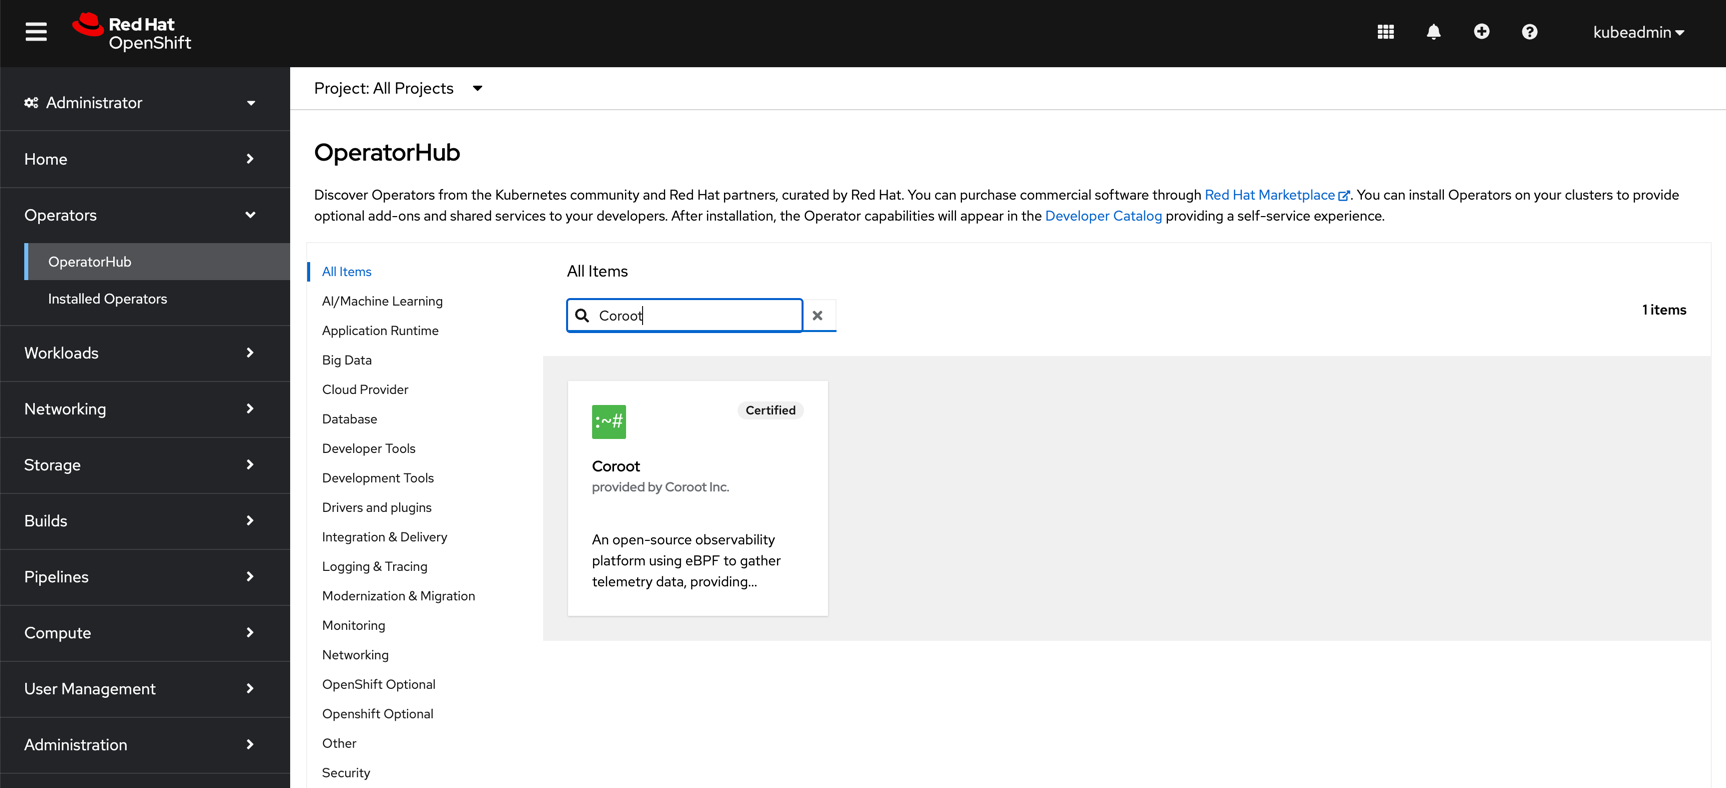
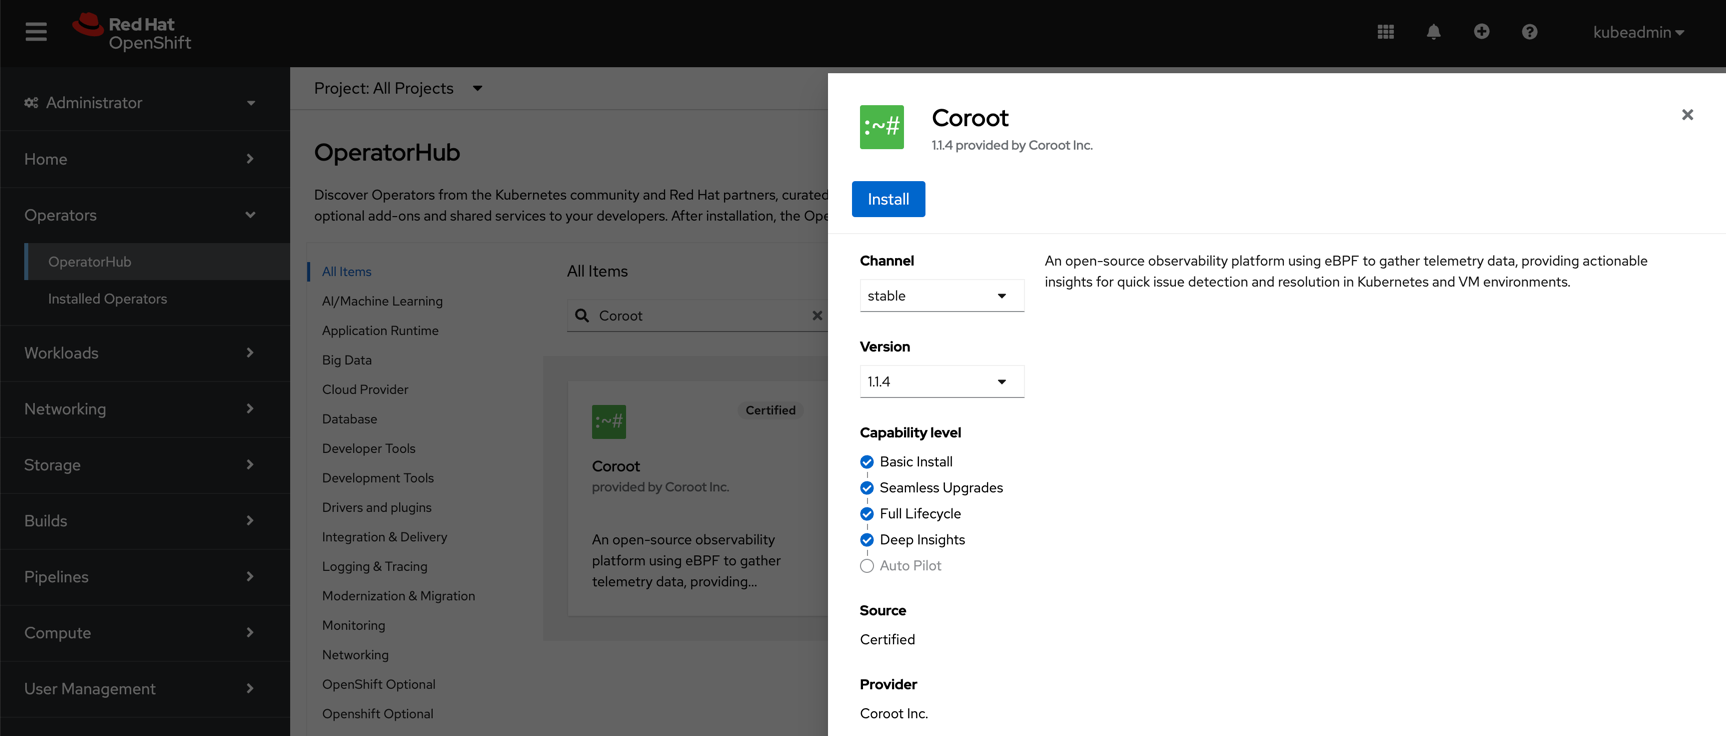
Click Install to install the operator.
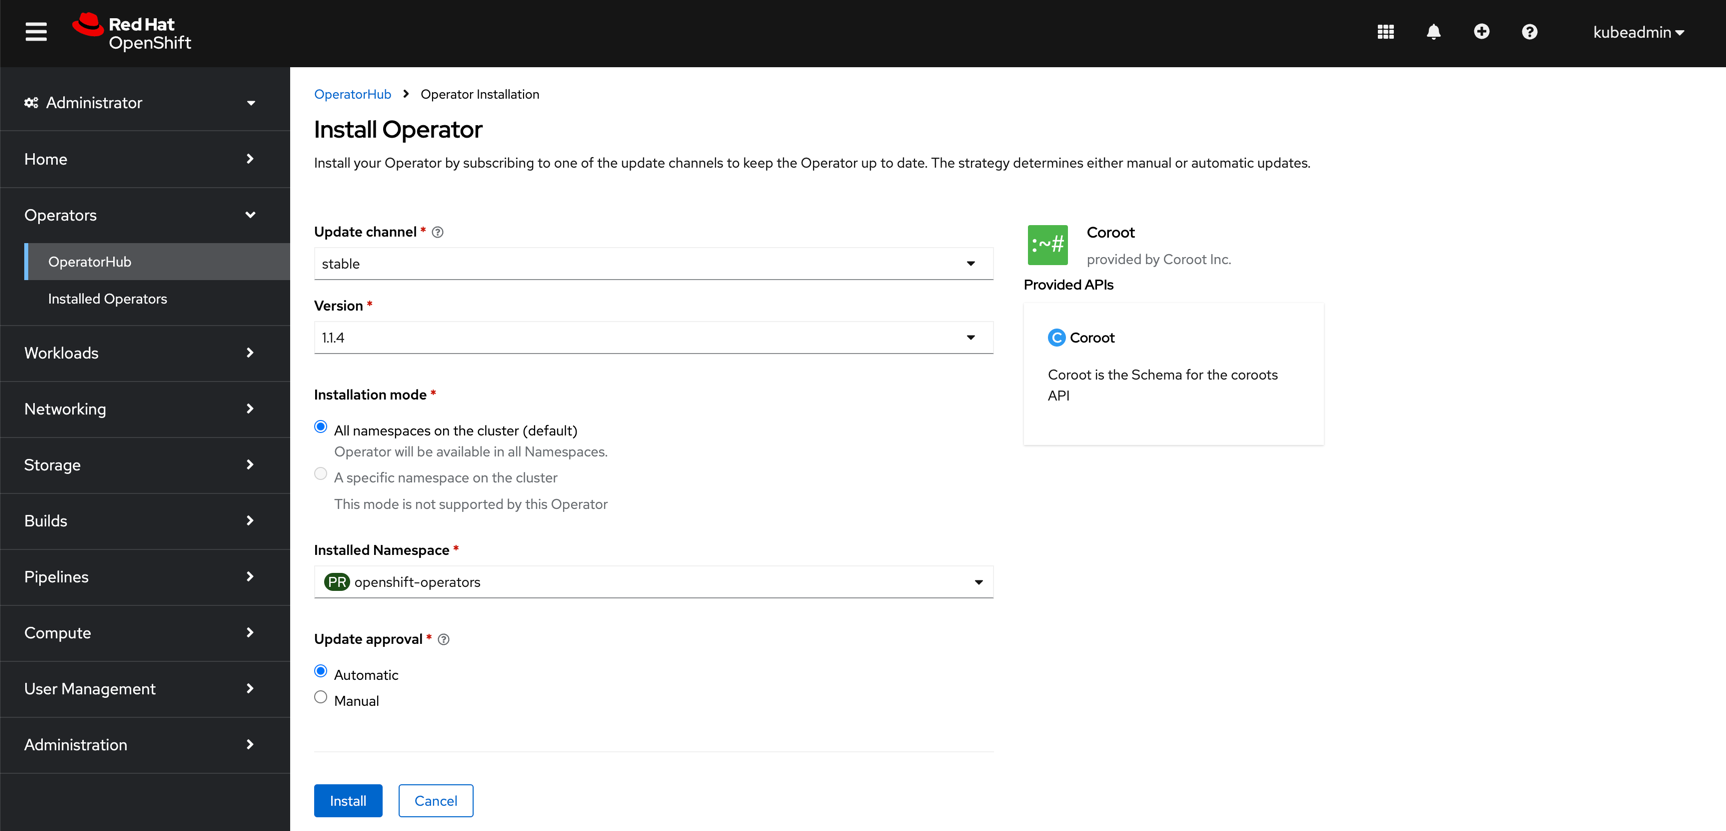
Configure the Operator installation as shown:
We recommend selecting Automatic for Upgrade Approval.
This setting automatically upgrades the operator whenever upgrades are available.
On successful installation, a message like the following appears:
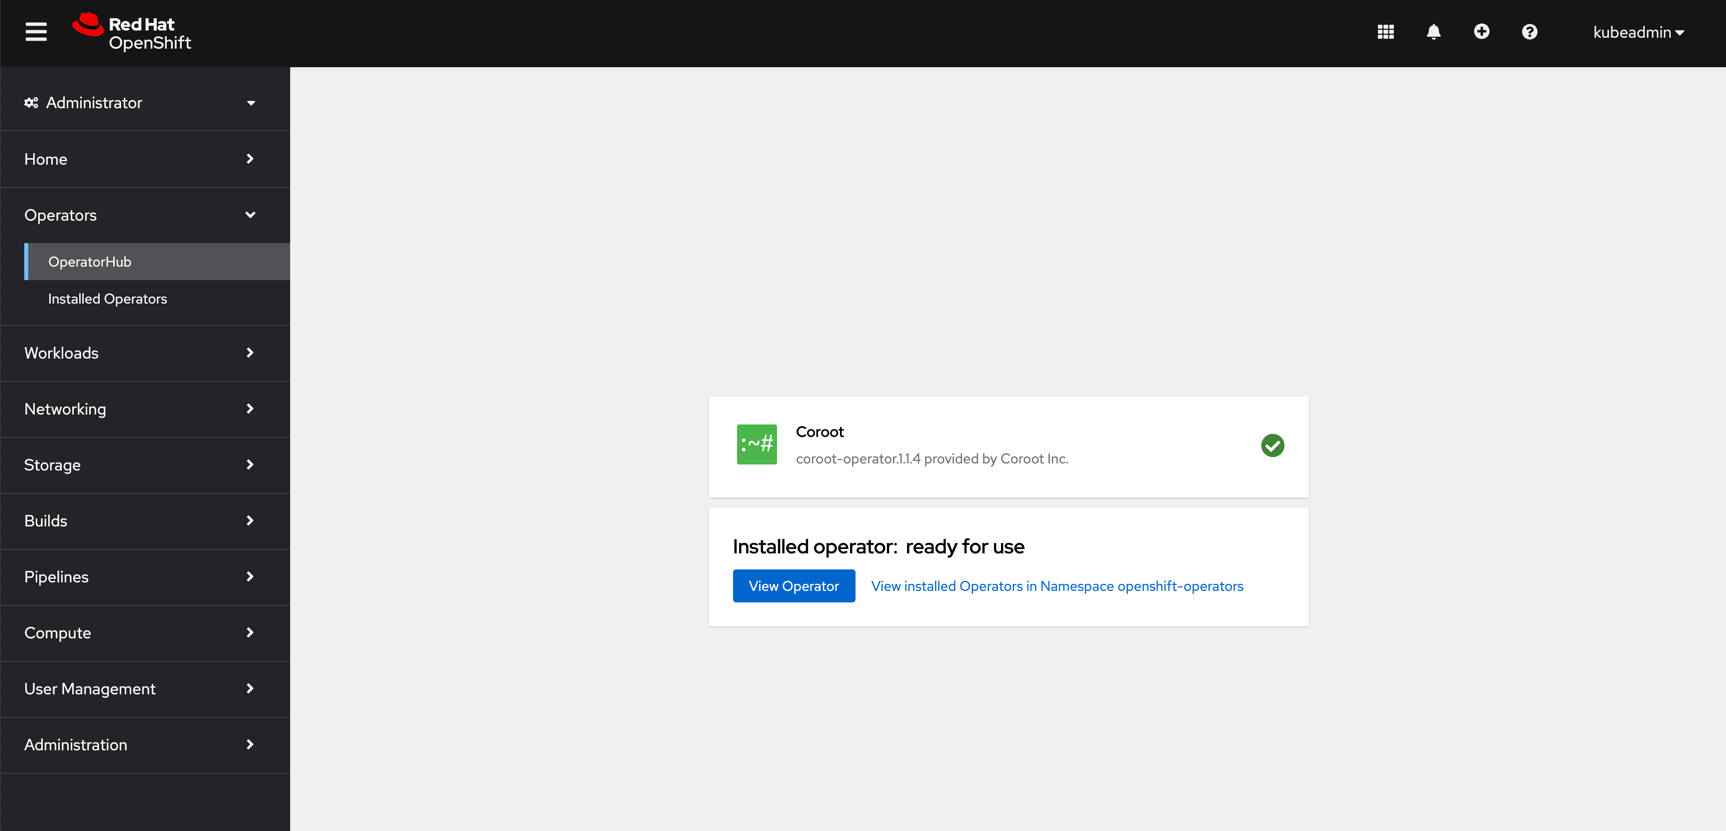
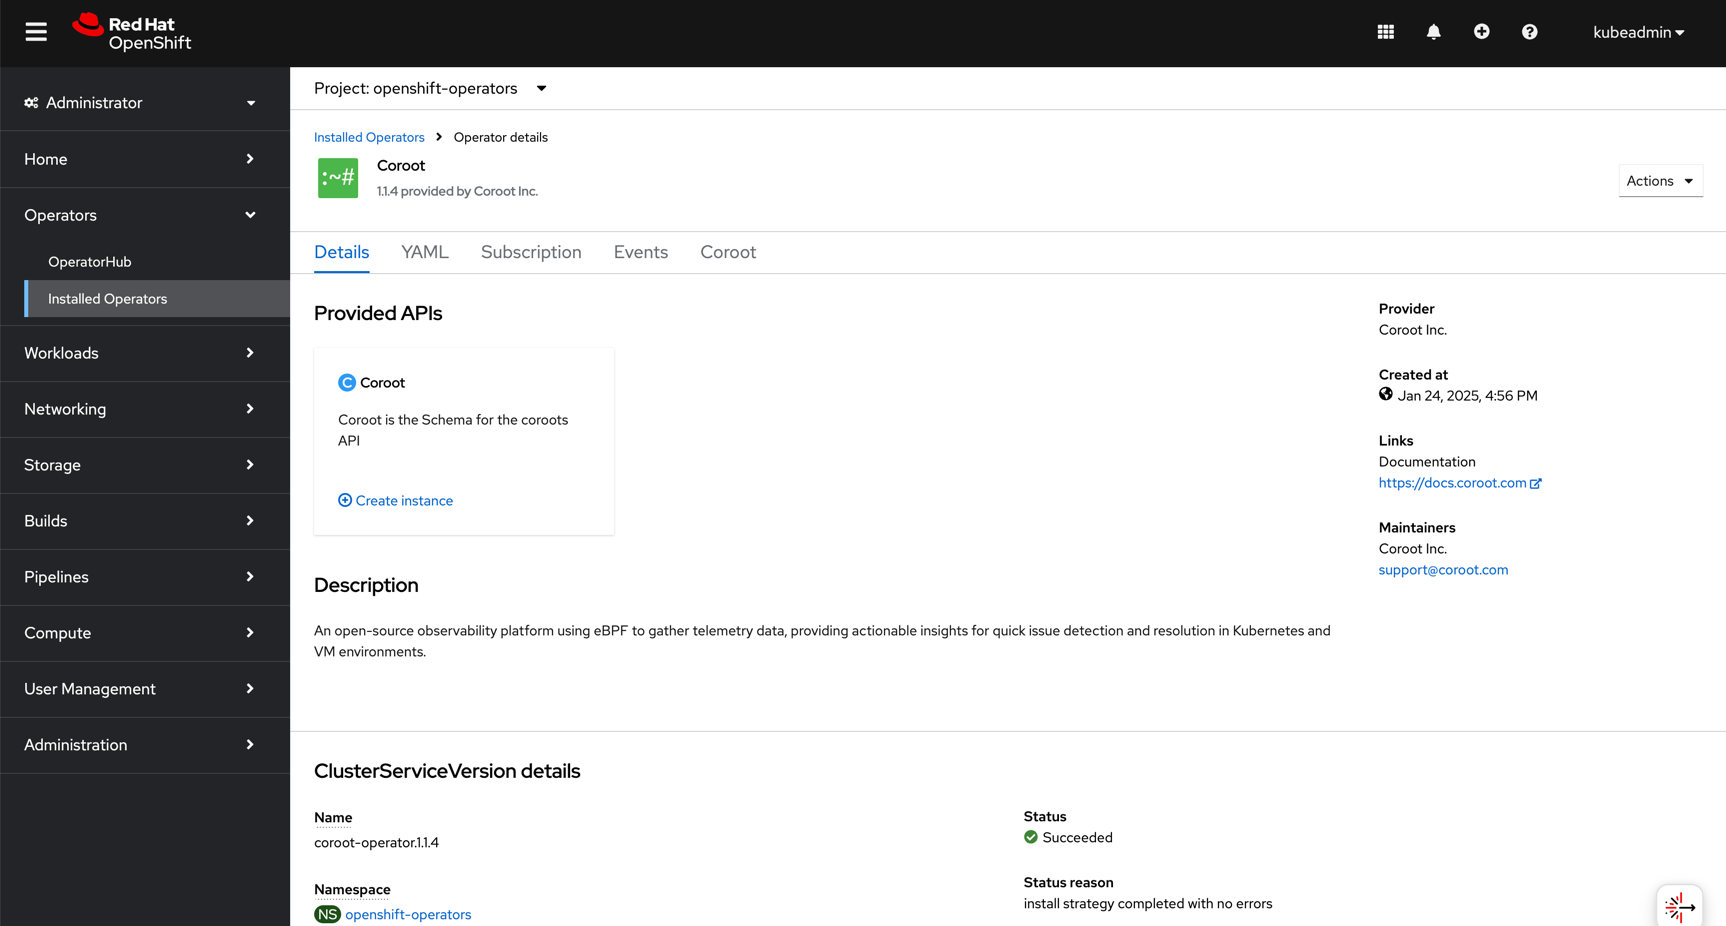
Select View Operator to verify the Operator details. You will see the following details:
Step#2: Install Coroot
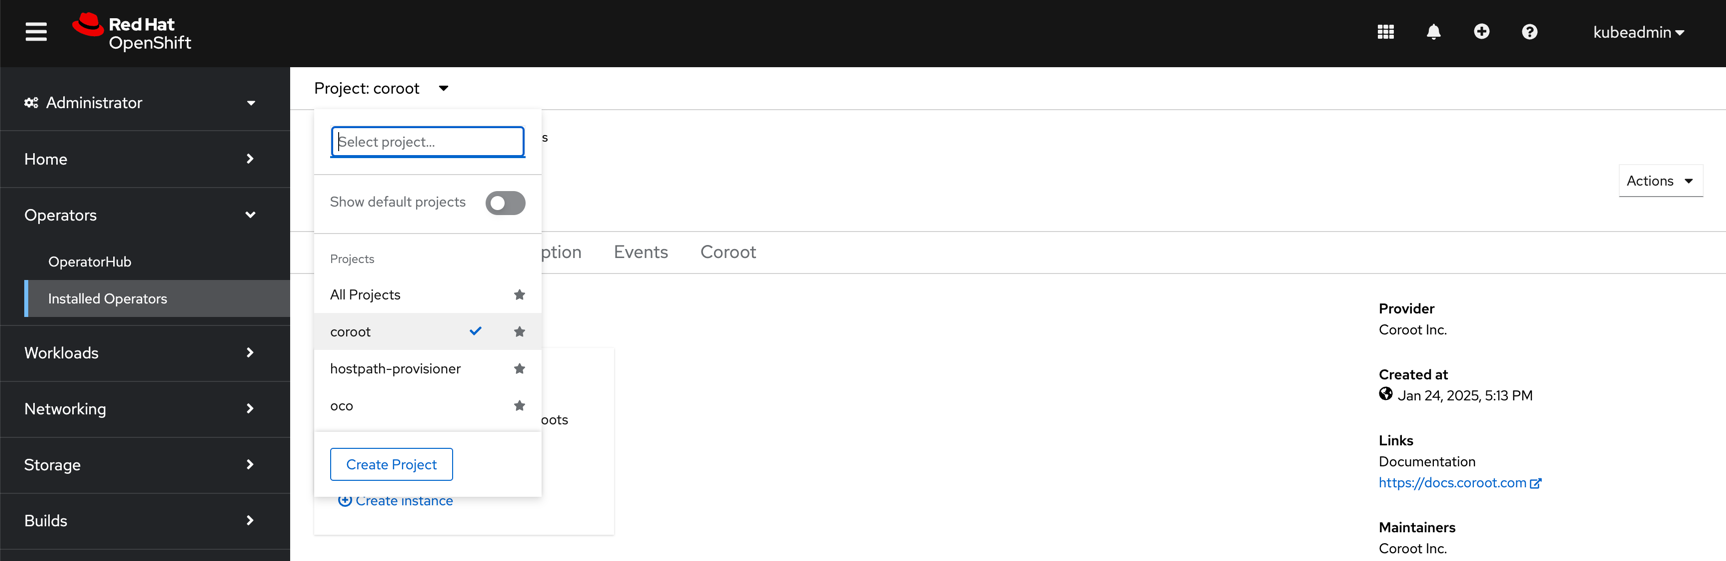
Select or create an appropriate project (aka namespace):
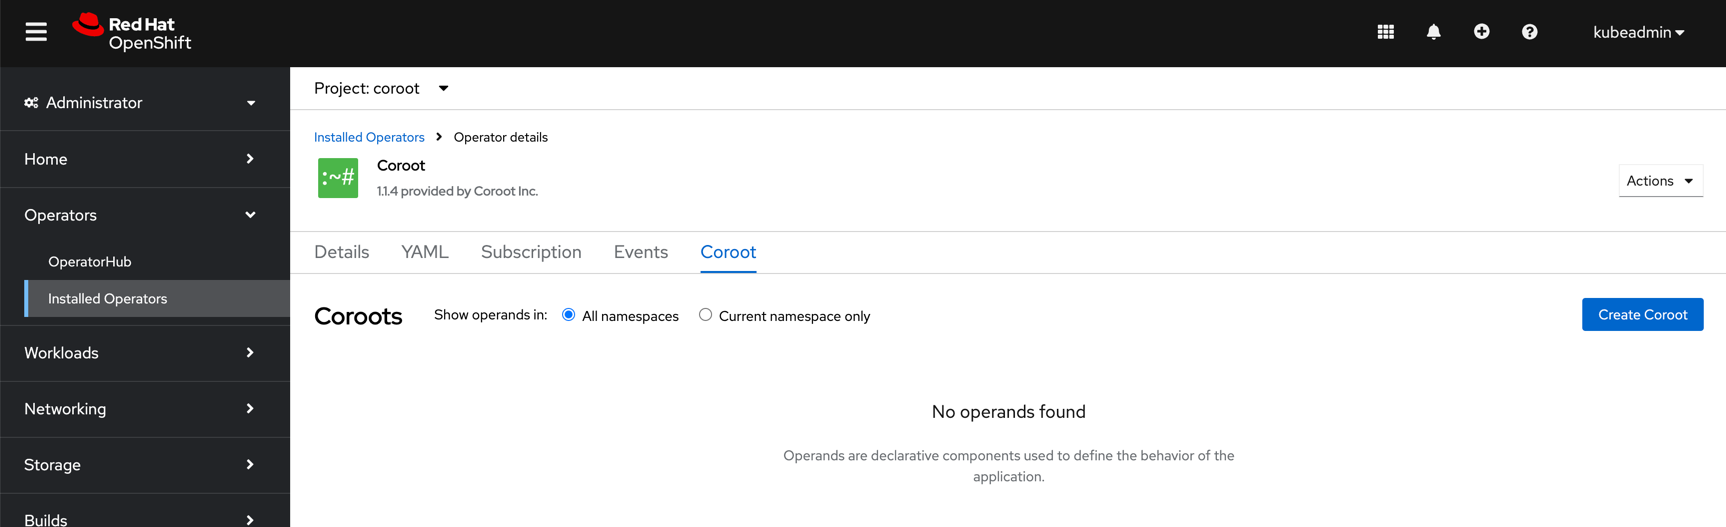
Select the Coroot tab and click Create Coroot.
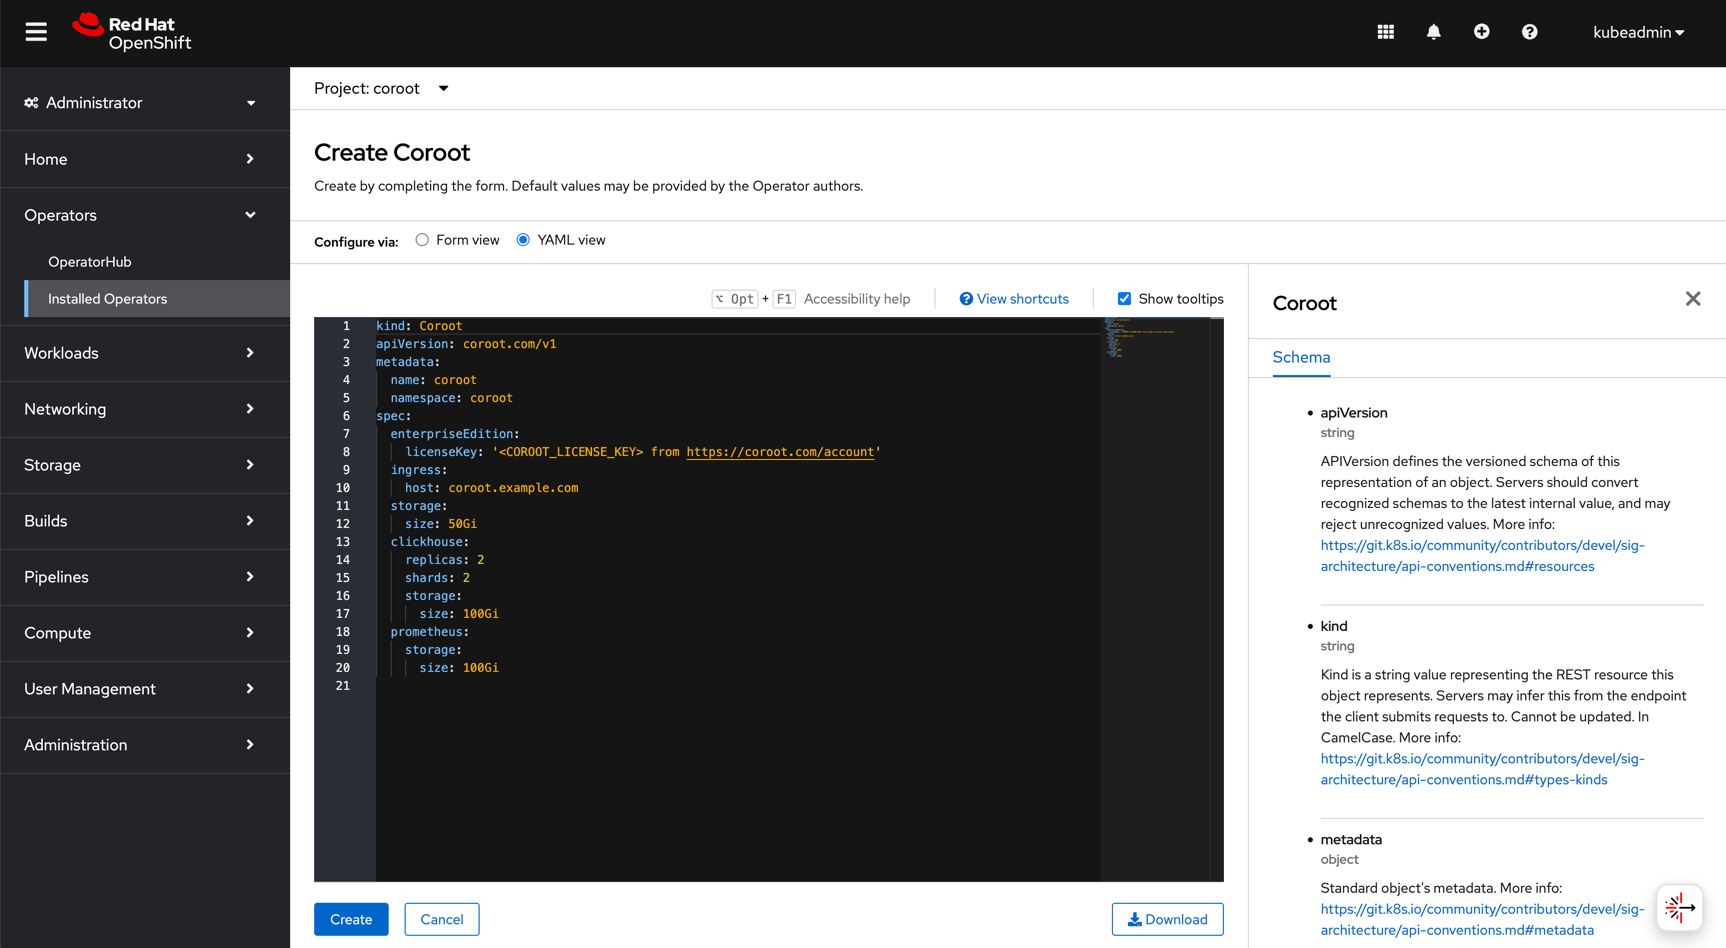
Fill out the necessary parameters, including:
- License key.
- Storage configuration.
- Ingress configuration.
Fill in the licenseKey parameter with a valid Coroot Enterprise license,
which can be acquired from the Customer Portal.
Then click Create.
Step#3: Verify the installation
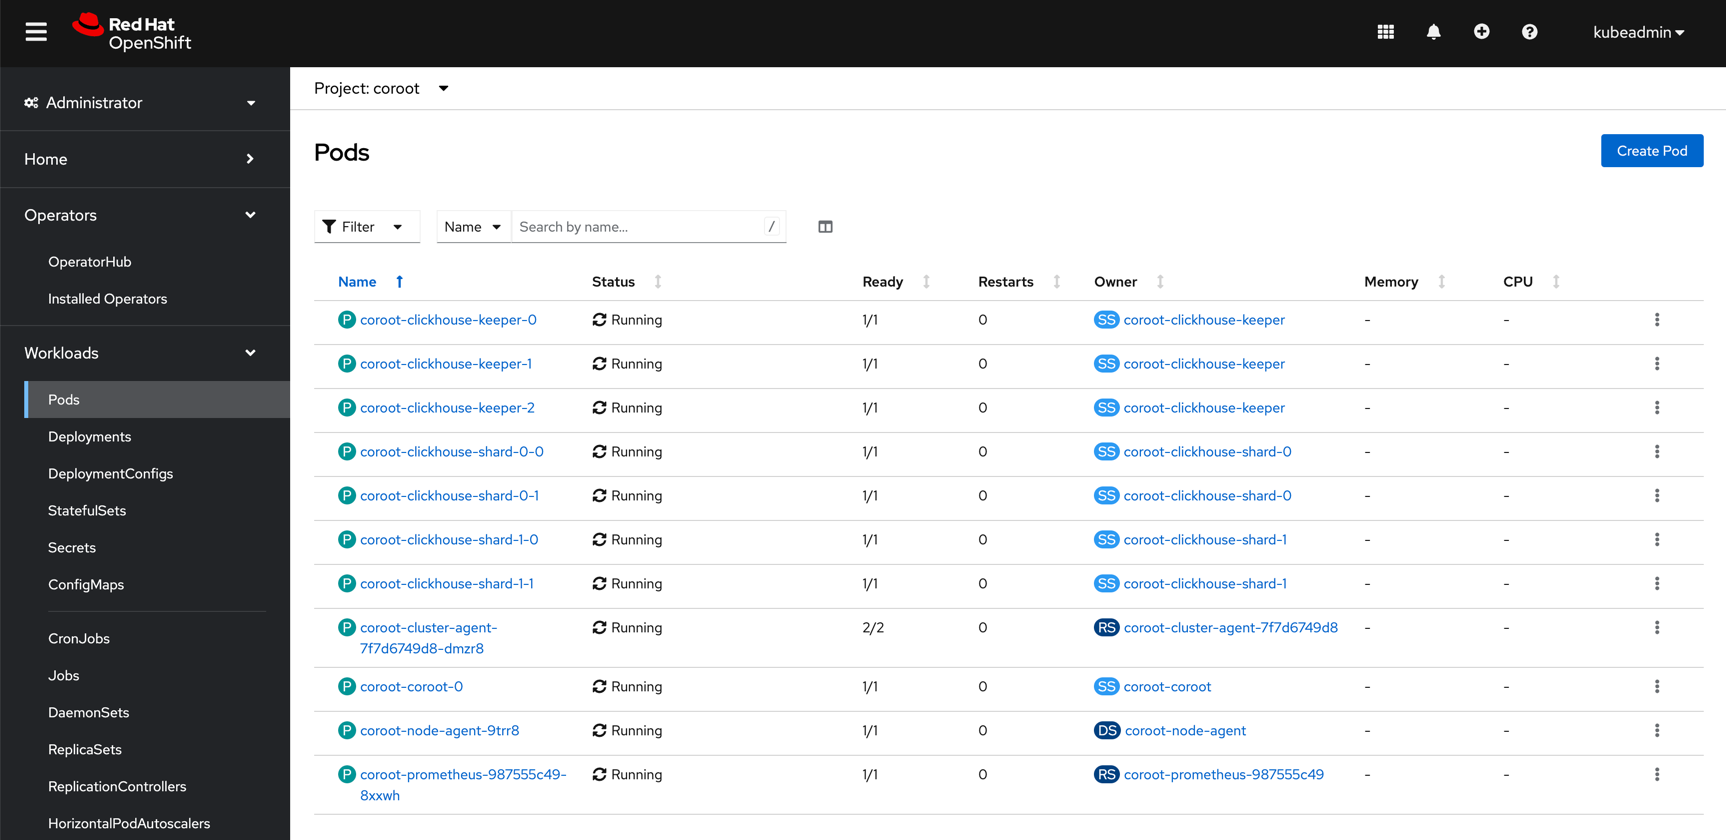
- Navigate to
Workloads>Podsand check the namespace where Coroot Enterprise Edition was deployed. - Verify that all Coroot pods are running without issues.
- Access Coroot in your browser by using the configured Ingress host, such as http://coroot.example.com.